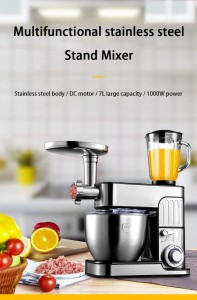
Are you an aspiring baker or a seasoned culinary enthusiast looking to perfect your baking skills? One of the basic techniques you need to master is the art of creaming cream and sugar. While there are various ways to achieve the desired texture, using a stand mixer can make the process more efficient and consistent. In this blog, we’ll walk you through the steps of creaming butter and sugar with a stand mixer, ensuring a light, fluffy, perfectly blended mixture for your baked creations.
Step 1: Gather the ingredients
Gather the desired ingredients before entering the creaming process. You’ll need unsalted butter softened at room temperature, granulated sugar, and a stand mixer with the paddle attachment. Having all your ingredients ready will save you time and make for a smoother experience.
Step Two: Prep the Stand Mixer
Make sure your stand mixer is clean and has the paddle attachment installed. Install the bowl securely and turn the speed setting down. This ensures better control and prevents splashing of ingredients.
Step Three: Cut the Butter into Cubes
To speed up the creaming process and ensure even distribution, cut the softened butter into smaller pieces. This will allow the stand mixer to draw in air more effectively, resulting in a lighter texture.
Step Four: Start Whipping Cream
Put butter and sugar in the bowl of a stand mixer. Beat them on low speed first to avoid splashing. Gradually increase speed to medium-high and beat until mixture is pale yellow, light in color and fluffy. This process takes approximately 3-5 minutes.
Step 5: Scrape the Bowl
Occasionally, stop the mixer and use a spatula to scrape down the sides of the bowl. This ensures that all ingredients are evenly mixed. Always turn off the blender before scraping to avoid accidents.
Step 6: Test for correct consistency
To determine if the butter and sugar are creaming correctly, do a quick test. Pinch out a small amount of the mixture with your fingers and knead them together. If you feel any grains, the mixture needs more emulsification. Keep stirring for a while until the mixture becomes smooth and silky.
Step 7: Adding the Other Ingredients
Once the desired creamy consistency is achieved, you can move on to adding other ingredients to the recipe, such as eggs or dressings. Mix on low speed initially, then gradually increase speed until all ingredients are fully combined.
Step 8: Finishing touches
Remember to stop the mixer periodically to scrape down the sides of the bowl, making sure all ingredients are well mixed. Avoid overmixing, or the batter may become dense and affect the texture of the final baked good.
Mastering the art of creaming butter and sugar is essential to creating light and fluffy baked goods. Using a stand mixer not only simplifies the process, but also ensures consistent results. By following these steps, you’ll be able to create delicious cakes, cookies, and pastries with ease. So grab your stand mixer, roll up your sleeves, and embark on a baking adventure that will delight you and your loved ones!
Post time: Aug-05-2023

